




![Longevity Complete Detox [BETA 21 Caps]: 7 Day Intensive Detox & Digestive Support](http://longevitypremier.com/cdn/shop/files/DetoxBeta-mid_100x100.png?v=1787365739)






80% Bladder Rule: Get Accurate Home Blood Pressure Cuff Readings
Use a validated automatic upper-arm monitor, not a wrist or finger device, and match the cuff so its bladder length covers at least 80% of your mid-upper-arm circumference. Rest quietly for five minutes first, then take two or three readings a minute apart and average them. Get those two things right and the rest of the process is just consistency.
TL;DR:
- Using a validated upper-arm monitor with a cuff covering at least 80% of your arm’s circumference prevents consistently overestimating systolic pressure.
- Resting quietly for five to ten minutes and avoiding caffeine, nicotine, alcohol, or exercise for 30 minutes before measurement improves accuracy significantly.
- Proper cuff placement on bare skin, about one inch above the elbow, with the cuff snug but not tight, is essential for reliable readings.
- Taking multiple readings one minute apart and averaging them provides the most accurate reflection of your blood pressure trend.
- Technique, including posture, arm support, and measurement timing, impacts results more than the monitor’s price or features.
Table of Contents
- Quick Checklist: How to Take an Accurate Blood Pressure Reading
- How Should You Prepare Before Measuring Blood Pressure?
- How Do You Measure for the Correct Blood Pressure Cuff Size?
- Where Exactly Should the Cuff Sit on Your Arm?
- How Do You Actually Take the Reading, Step by Step?
- What Do Your Blood Pressure Numbers Actually Mean?
- What Mistakes Cause Inaccurate Blood Pressure Readings?
- How Can You Validate Your Home Blood Pressure Readings?
- Why Technique Matters More Than the Device You Buy
- Support Your Cardiovascular Wellness Routine Alongside Consistent Monitoring
- Sources
- FAQ
Quick Checklist: How to Take an Accurate Blood Pressure Reading
Run through these steps in order every time you measure:
- Skip caffeine, tobacco, alcohol, and exercise for 30 minutes beforehand, and use the bathroom first.
- Sit quietly with your back supported for 5 to 10 minutes before starting.
- Measure your arm and choose a cuff where the bladder length covers at least 80% of your arm’s circumference.
- Wrap the cuff on bare skin, about 1 inch above the elbow crease, and rest your arm at heart level.
- Take two to three automated readings, one minute apart, and average the results.
- Log the time, your posture, and the numbers, especially if your clinician asked you to track trends.
How Should You Prepare Before Measuring Blood Pressure?
What you do in the 30 minutes before you strap on a cuff changes the number more than most people realize. Caffeine, nicotine, alcohol, and even a brisk walk to the bathroom can temporarily push systolic pressure up several points, which is why the CDC recommends avoiding all four for at least half an hour before testing.
A full bladder alone can raise a reading by a noticeable margin, so use the bathroom before you sit down for your measurement.
After that, settle into a chair with:
- Your back supported, not perched on a stool or the edge of a bed
- Feet flat on the floor, legs uncrossed
- Sleeves rolled up or removed, since tight fabric bunched above the cuff distorts pressure
- Five to ten minutes of quiet sitting before the first reading
If you’ve never had both arms checked side by side, ask your clinician to compare them once. A meaningful gap between arms means you should always measure the same arm going forward.
How Do You Measure for the Correct Blood Pressure Cuff Size?
Correct cuff size for blood pressure accuracy starts with a tape measure, not a guess. Wrap a flexible tape around the midpoint of your upper arm, halfway between the shoulder and the elbow, and let it sit loosely against the skin.
That number determines which cuff bladder you need. Clinical guidance calls for a bladder length equal to at least 80% of that arm circumference, with bladder width around 37% to 40%. Most manufacturers translate this into labeled ranges:
- Small adult: a smaller range suitable for petite arms
- Standard adult: a common middle range fitting most adults
- Large adult: for larger arm sizes
- Adult thigh/extra large: designed for very large arm circumferences
If your arm circumference lands between two sizes, size up rather than down. A cuff that’s too small squeezes a smaller vessel area and consistently overestimates systolic pressure, sometimes by a wide margin, while an oversized cuff tends to underestimate it. Our detailed cuff-sizing guide walks through specialty sizing if your arm falls outside standard ranges.
Where Exactly Should the Cuff Sit on Your Arm?
Placement errors are sneaky because the monitor still spits out a number, just not an accurate one. The cuff belongs on bare skin, with its bottom edge about 1 inch (2.5 cm) above the crease of your elbow, positioned so the bladder centers directly over the brachial artery on the inside of your arm.
Fasten it snugly enough that you can’t slide more than one or two fingers underneath, but not so tight it pinches.
- Rest your forearm on a table or armrest so the upper arm sits at heart level
- Use a pillow under your arm if the surface is too low
- Never take a reading with your arm hanging at your side or raised above your heart
- Never measure over a rolled-up sleeve or thick fabric
Pro Tip: If your chair doesn’t have an armrest at the right height, stack a couple of books under a pillow. Heart-level alignment matters more than people expect, and a few inches off can shift the reading by several points.
How Do You Actually Take the Reading, Step by Step?
The mechanics differ slightly depending on whether you’re using an automatic monitor or the manual stethoscope method, but the goal is identical: a still, silent, well-supported few minutes.
Automatic upper-arm monitor:
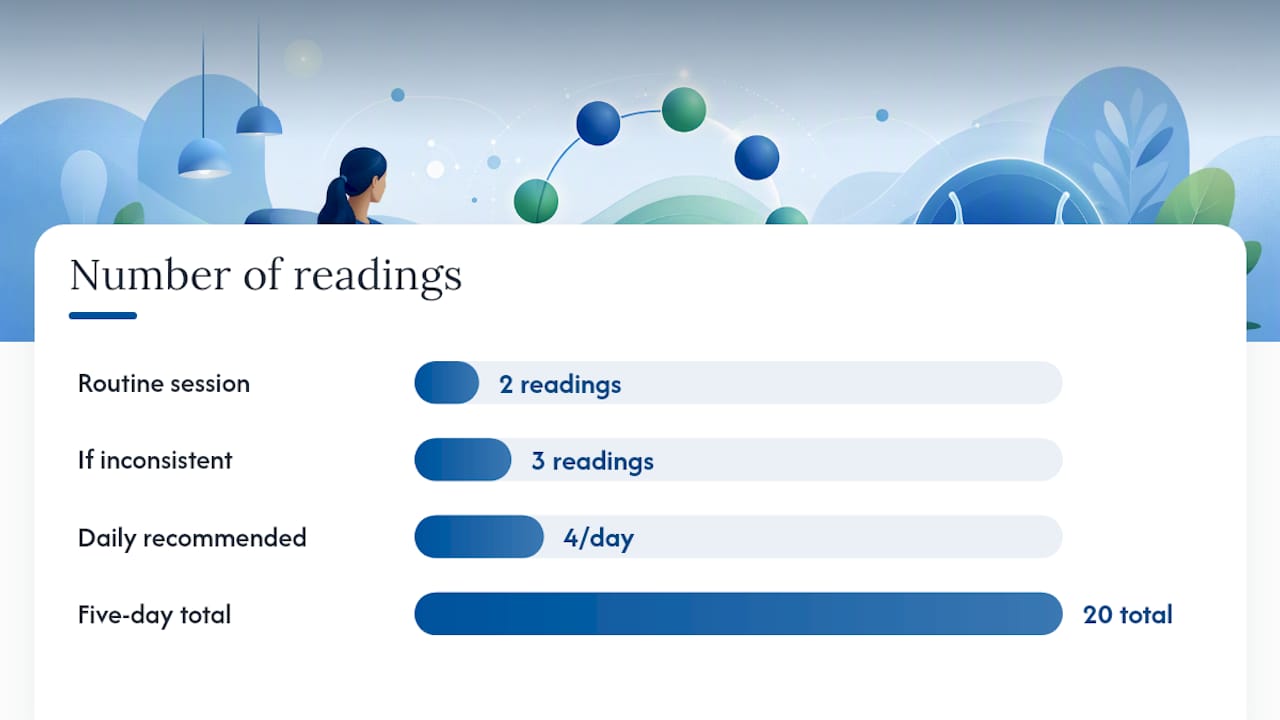
- Press start and stay silent and still until the cuff fully deflates and displays a result.
- Wait one full minute, then take a second reading in the same position.
- Take a third if the first two differ noticeably, then average all readings taken.
- Write down the time of day, which arm you used, and whether you were sitting or lying down.
Manual auscultatory method:
- Inflate the cuff roughly 30 mm Hg above your expected systolic pressure.
- Deflate slowly, about 2 to 3 mm Hg per second, while listening through the stethoscope.
- Note the systolic number at the first tapping sound and the diastolic number when the sound disappears.
For a fuller picture, MedlinePlus recommends checking twice in the morning and twice in the evening for five straight days, which yields a set of 20 or more readings rather than relying on one lucky (or unlucky) number.
What Do Your Blood Pressure Numbers Actually Mean?
A single reading tells you very little. A pattern over days tells you a great deal, and the FDA’s category breakdown gives you the reference points to judge where you land:
- Normal: below 120/80 mm Hg
- Elevated: systolic 120 to 129, diastolic under 80
- Stage 1 hypertension: systolic 130 to 139, or diastolic 80 to 89
- Stage 2 hypertension: 140/90 or higher
- Hypertensive crisis: above 180/120
A reading above 180/120 accompanied by chest pain, shortness of breath, vision changes, or confusion is an emergency. Call for urgent medical help rather than waiting to recheck it.
One high number doesn’t mean you should adjust or skip medication on your own. Bring your averaged log, not a single spike, to your clinician for any decision about treatment.
What Mistakes Cause Inaccurate Blood Pressure Readings?
Most bad readings trace back to a handful of repeat offenders, and nearly all of them are fixable once you know to watch for them.
- A cuff that’s too small for your arm circumference tends to push systolic numbers artificially high; recheck your arm measurement against the 80% bladder-length rule if your readings seem persistently elevated.
- Talking during the measurement can raise readings by a meaningful margin, so stay quiet until the cuff finishes.
- An unsupported or dangling arm throws off the heart-level alignment that the whole measurement depends on.
- Crossed legs raise both systolic and diastolic numbers slightly but consistently.
- Measuring over clothing adds pressure inconsistency that a bare arm avoids entirely.
If your home numbers keep running noticeably higher or lower than what you get at a clinic, bring the monitor and cuff with you and ask staff to compare it side by side with theirs.
How Can You Validate Your Home Blood Pressure Readings?
Confidence in your numbers comes from comparison, not assumption. Bring your home monitor and cuff to a clinician’s office at least once and check it against their equipment. This confirms both that the device itself is accurate and that your cuff actually fits.
- Ask a nurse or clinician to watch you take a reading and correct your technique on the spot.
- Choose a device from a validated monitor list such as ValidateBP rather than an unverified model.
- Keep a consistent log with the time, your posture, and both numbers for every reading, not just the ones that look concerning, as explained in this Medication Adherence Programs: A Guide for Employers to support accurate tracking and better health outcomes.
- Measure at the same time of day and on the same arm each session so trends actually mean something.
Home readings, done consistently, often reflect your typical daily pressure more accurately than a single office visit, since they sidestep the anxiety spike some people get in a clinical setting. Our blood pressure log resource gives you a structured place to keep that record.
Why Technique Matters More Than the Device You Buy
Here’s what surprises most people: the priciest monitor on the shelf won’t fix bad technique. A validated upper-arm cuff used with a full bladder, crossed legs, and a slumped posture will still hand you a misleading number. Technique is the free upgrade nobody talks about.
I’d rather see someone practice proper positioning with a $20 cuff than buy a premium monitor and skip the five minutes of quiet sitting beforehand. Pair that discipline with resources like a structured blood pressure log from Longevitypremier, and you get a record worth bringing to your next appointment, not just a number you glance at and forget.
— Charles
Support Your Cardiovascular Wellness Routine Alongside Consistent Monitoring
Longevitypremier is built for people who want a more proactive, whole-picture approach to cardiovascular wellness, not just a number on a cuff. That means pairing accurate home monitoring with everyday habits that support how your heart and circulation function day to day.

The Longevity Blood Pressure Formula is formulated with ingredients like hawthorn, garlic, sage, and rutin, chosen to support cardiovascular health as part of a broader wellness routine, not as a replacement for measuring your numbers or working with your clinician. It’s one option among the full range of Longevitypremier formulas built around specific wellness goals, from healthy glucose metabolism to normal liver function support.
If you’re tracking your numbers regularly, keep both threads going: log your readings with our blood pressure log, and explore the Longevity Blood Pressure Formula to see whether it fits into your daily routine.
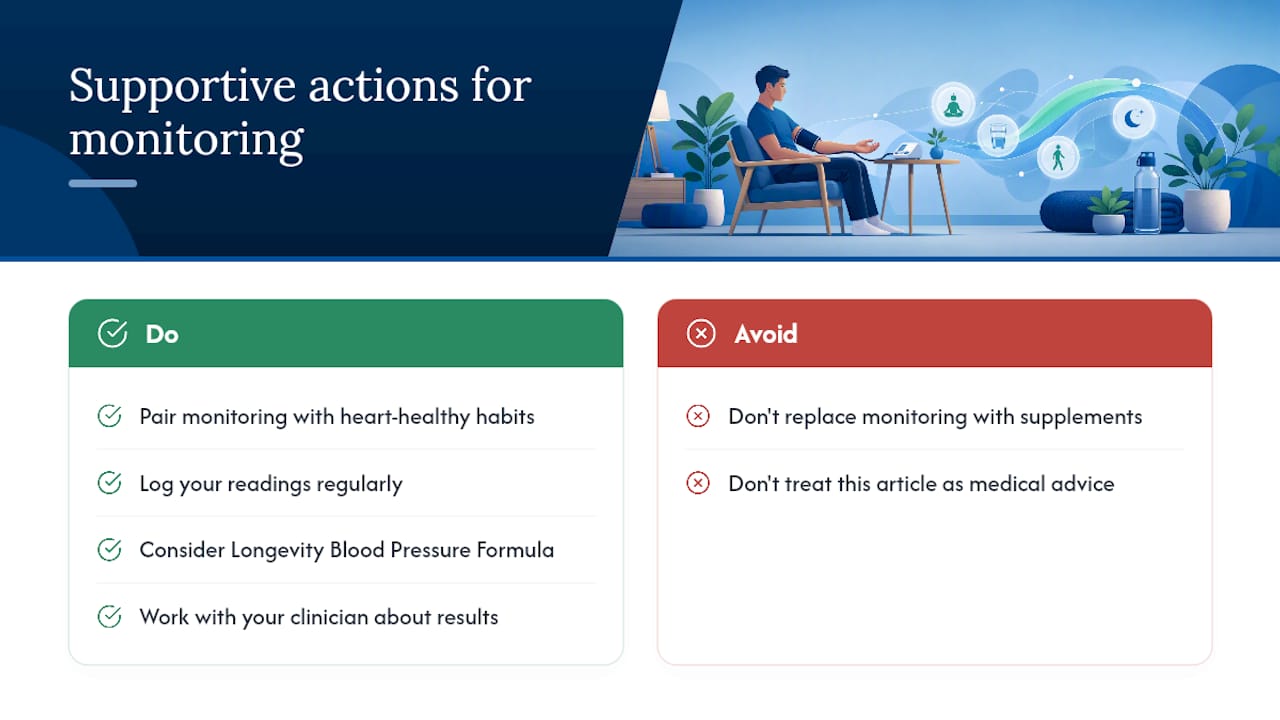
This article is general information, not a substitute for advice from a qualified doctor. Consult a qualified healthcare professional about your own circumstances before acting on anything here.
Sources
- CDC — How to measure your blood pressure
- MedlinePlus — Blood pressure measurement
- Wayne State — Cuff selection and measurement
- Mayo Clinic — Home blood pressure monitoring
FAQ
How Do I Measure My Arm for the Correct Cuff Size?
Wrap a flexible tape around the midpoint of your upper arm, between your shoulder and elbow, while your arm hangs relaxed. Match that measurement to a cuff whose bladder length covers at least 80% of your arm circumference, sizing up if you fall between two ranges.
Can a Small Blood Pressure Cuff Cause a High Reading?
Yes. A cuff that’s too small for your arm tends to compress the artery unevenly and consistently pushes systolic readings higher than they actually are. If your numbers seem oddly elevated, recheck your arm circumference against the cuff’s labeled size range before assuming anything about your health.
What Are the Ideal Bladder Length and Width for a Blood Pressure Cuff?
The bladder length should cover at least 80% of your mid-upper-arm circumference, with bladder width around 37% to 40% of that same circumference. Manufacturers translate these ratios into small, standard, and large adult labels, but the tape measure is the only reliable way to confirm your actual size.
How Do You Take a Blood Pressure Reading With a Cuff?
Sit quietly for five minutes with your back supported and your arm resting at heart level, then place the cuff on bare skin about 1 inch above your elbow crease. Take two to three readings one minute apart and average them, recording the time and posture for consistency.
Does Longevitypremier Sell Products That Support Blood Pressure Wellness?
Yes. The Longevity Blood Pressure Formula is formulated with ingredients like hawthorn and garlic to support cardiovascular health as part of a broader wellness approach. It is designed to complement your regular home blood pressure monitoring routine.